
Tomatoes and other high-acid foods may be processed using a water-bath canner as opposed to a pressure canner. The following are basic guidelines and images coming from the Ball Blue Book Guide to Preserving .
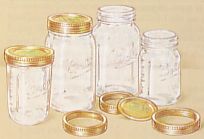
1. Visually examine canning jars for nicks, cracks, uneven rims or sharp edges that may prevent sealing or cause breakage. Examine canning lids to ensure they are free of dents and sealing compound is even and complete. Check bands for proper fit.
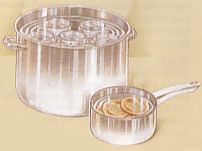
2. Wash jars and two-piece caps in hot, soapy water. Rinse well. Dry bands; set aside. Heat jars and lids in a saucepot of simmering water (180°F or 82°C). DO NOT BOIL LIDS. Allow jars and lids to remain in hot water until ready for use, removing one at a time as needed. 3. Fill boiling-water canner half-full with hot water. Elevate rack in canner. Put canner lid in place. Heat water just to a simmer (180°F or 82°C). Keep water hot until used for processing.

3. Select fresh tomatoes at their peak of quality and flavor. Use firm tomatoes free of cracks, spots and growths. Prepare only enough for one canner load. Wash tomatoes; drain.
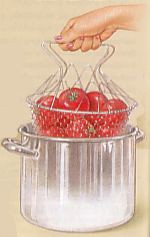
4. Place tomatoes in wire basket and lower into a large saucepot of boiling water. Blanch tomatoes 30 to 60 seconds or until skins start to crack. Remove from boiling water. Dip immediately into cold water.

5. Slip off skins; trim away any green areas; cut out core. Leave tomatoes whole or cut into halves or quarters. For tomatoes packed in water, place tomatoes in a large saucepot, adding just enough water to cover. Boil gently 5 minutes. Remove canning jar from hot water with a jar lifter; set jar on towel. Add 1 tablespoon bottled lemon juice to each pint jar, 2 tablespoons bottled lemon juice to each quart jar.

6. Carefully pack tomatoes into hot jar, leaving 1/2-inch headspace. Ladle boiling water or cooking liquid over tomatoes, leaving 1/2-inch headspace. Add 1/2 teaspoon salt per pint jar or 1 teaspoon salt per quart jar, if desired.
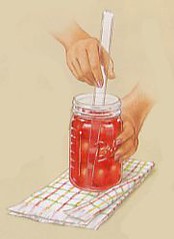
7. Slide a nonmetallic spatula between tomatoes and jar; press back gently on tomatoes to release trapped’ air bubbles. Repeat procedure 2 to 3 times around inside of jar.
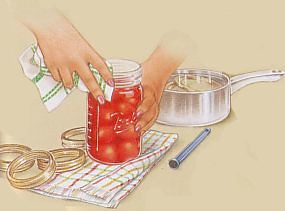
8. Wipe rim and threads of jar with a dean, damp cloth. Remove lid from hot water using a lid wand. Place lid on jar, centering sealing compound on rim. Screw band down evenly and firmly, just until resistance is met-fingertip tight.
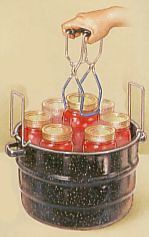
9. As each jar is filled, set it onto the elevated rack in the boiling-water canner. Water in canner should be kept at a simmer (180°F or 82°C). After all jars are filled and placed onto the rack, lower rack into canner. Water must cover the two-piece caps on the jars by 1 to 2 inches. Add boiling water, if necessary. 13. Put lid on canner. Bring water to a boil. Start counting processing time after water comes to a rolling boil. Process pints 40 minutes, quarts 45 minutes, at a gentle but steady boil for altitudes at or below 1,000 feet above sea level. For higher altitude areas, consult your local extension office.
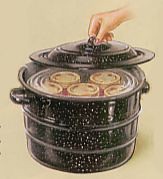
10. When processing time is complete, turn off heat and remove canner lid. Let canner cool minutes before removing jars. Remove jars from canner and set them upright, 1 to 2 inches apart, on a dry towel to cool. Do not retighten bands. Let jars cool 12 to 24 hours.
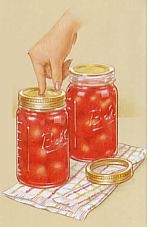
11. After jars have cooled, check lids for a seal by pressing on the center of each lid. If the center is pulled down and does not flex, remove the band and gently try to lift the lid off with your fingertips. If the lid does not flex and you cannot lift it off the lid has a good vacuum seal. Wipe lid and jar surface with a clean, damp cloth to remove food particles or residue. Label. Store jars in a cool, dry, dark place.




Comments are closed.