Tabasco sauce is the brand name for a hot pepper sauce produced in Avery Island, Louisiana. You’ve no doubt seen the tiny, iconic bottle at your favorite diner or greasy spoon and, perhaps, wondered how this world-famous condiment is made. Although the recipe for the original sauce is top secret and, legend has it, guarded by an army of 10,000 ravenous crayfish somewhere deep in the bayou, the ingredient list is surprisingly short: peppers, vinegar, and salt. The one ingredient that doesn’t appear on the label but should is “time.” Tabasco sauce’s deep flavor comes from having fermented in white oak barrels for three years. While reproducing the exact flavor of Tabasco sauce is difficult to do, you can approximate it in your kitchen using your own homegrown hot peppers. The original recipe calls for tabasco peppers (Capsicum frutescens var. tabasco) but you can pretty much use any type of hot pepper you like. I make mine using a Jalapeño variety which is milder on the Scoville spiciness scale, but more than hot enough for most people’s palette.
Ingredients
hot peppers
white vinegar
salt
Preparation
The pictures and photos below set out the main steps involved. Before undertaking any project with spicy peppers, be sure to keep in mind that peppers can be dangerous when improperly handled (think “pepper spray”). The hotter the pepper you’re using the more precaution you need to take to protect your skin, eyes, and nasal passages from irritation.
Step 1: Timing the harvest
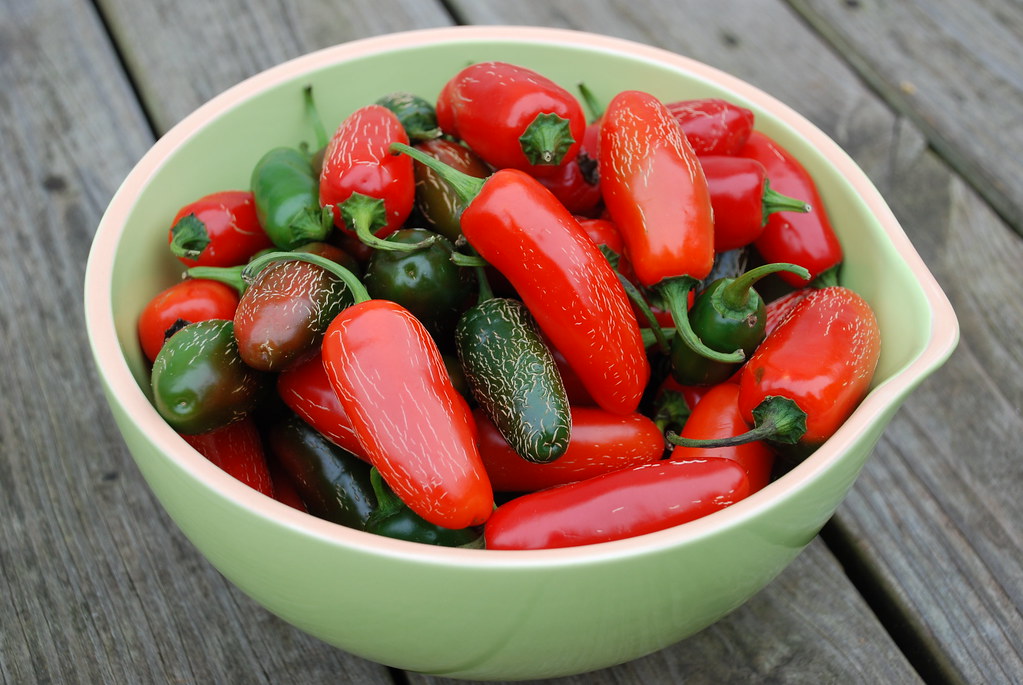
To make a fermented hot sauce, you need to pull liquid from the peppers in the same way that liquids are pulled from cabbage to produce sauerkraut. This means starting with fresh, fleshy peppers at the peak of ripeness. The experts at Avery Island use a stick tinted red (called a “baton rouge”) for insuring that peppers have reached the right stage of red ripeness, but you can be more flexible. Chances are that you won’t have all your peppers ripening at exactly the same time and there’s no harm in throwing a green one or two into the mix.
Step 2: Preparing your peppers
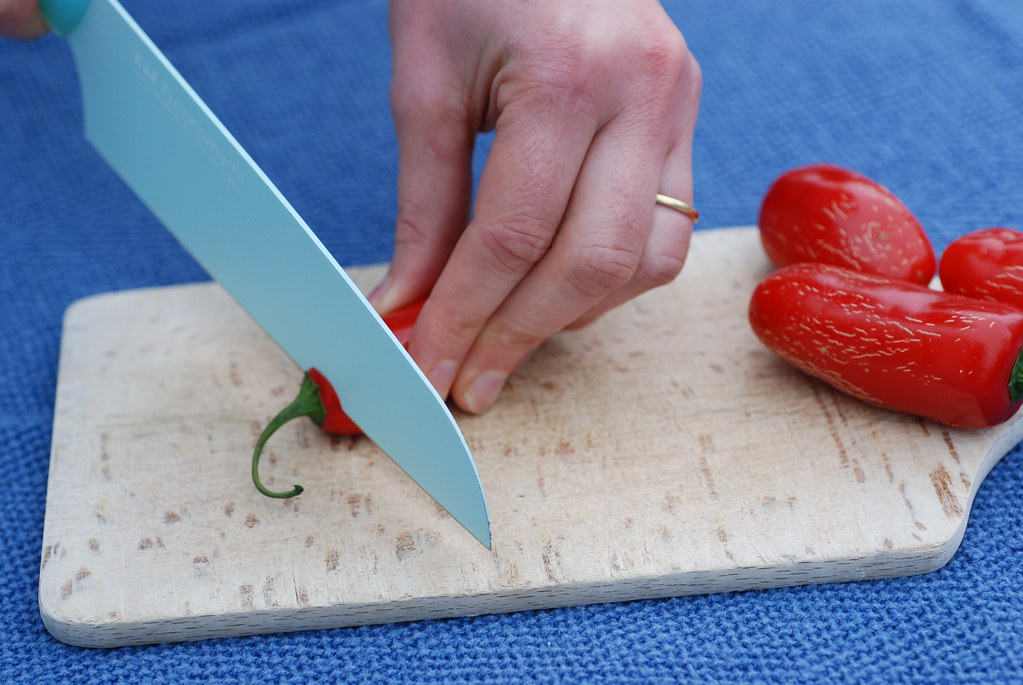
You’ll want to chop off the green stems. If you’re not wearing gloves, be careful not to touch your eyes afterward.
Step 3: Making a mash
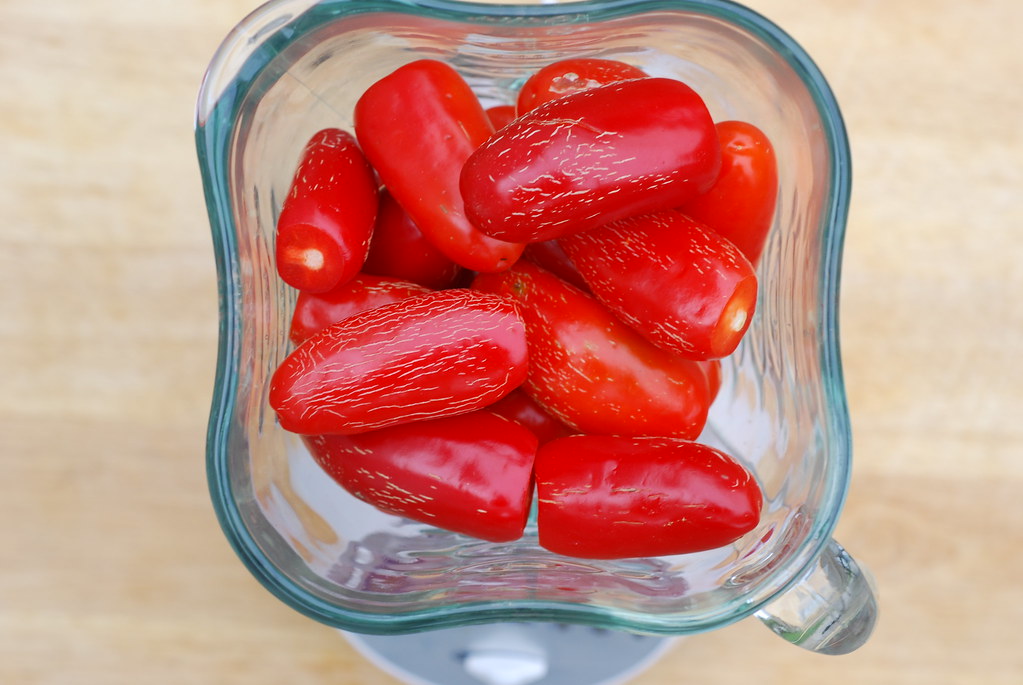
Once you’ve harvested your peppers and removed the stems, you’ll need to grind them into a medium to fine mash with a food processor or blender. I place my mashed peppers in a ceramic crock but you can use a glass or food-grade plastic container.
Step 4: Adding salt
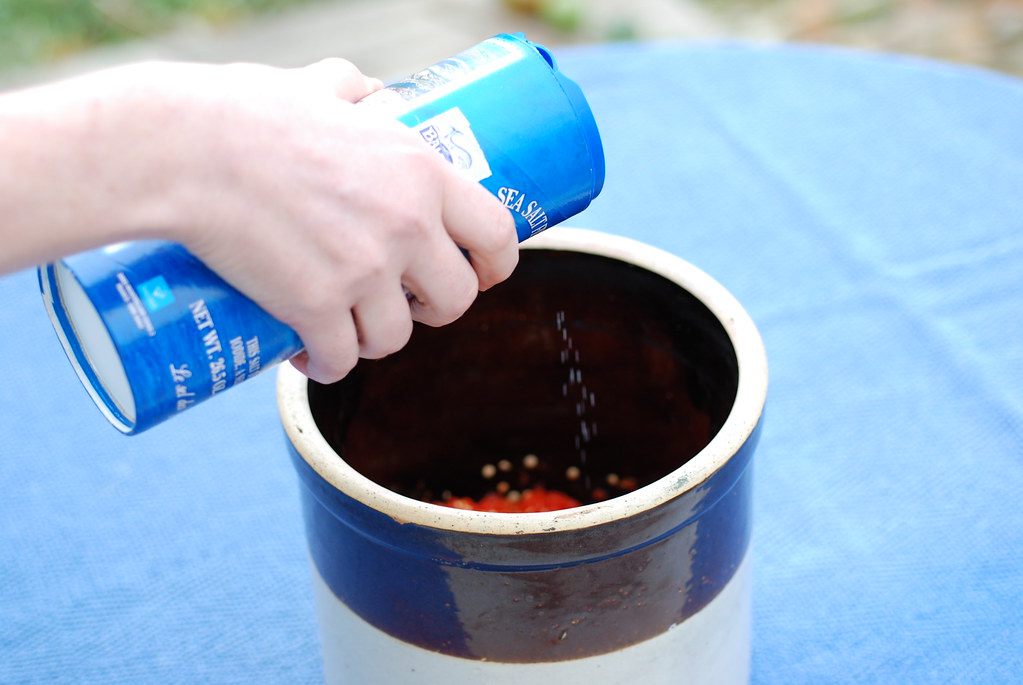
Salt does two important things: it helps pull water from peppers (think about what happens when you salt a cucumber) and enhances their flavor. The ratio of mashed peppers to salt is not an exact science, but 30:1 should work for most peppers. Mix the salt in with the mash and pack it down to the bottom of your container. As the water seeps out it should cover the mash and prevent it from being exposed to the air. If you’re not pulling enough water out to do this, you can add some salted water to your container to cover the mash.
VERY IMPORTANT: Be sure to cover the mash with a plate which has a heavy object on it in such a way that the level of the brine is higher than the plate. The brine is the protective buffer that keeps the mash from spoiling.
Step 5: Letting the mash ferment and stabilize
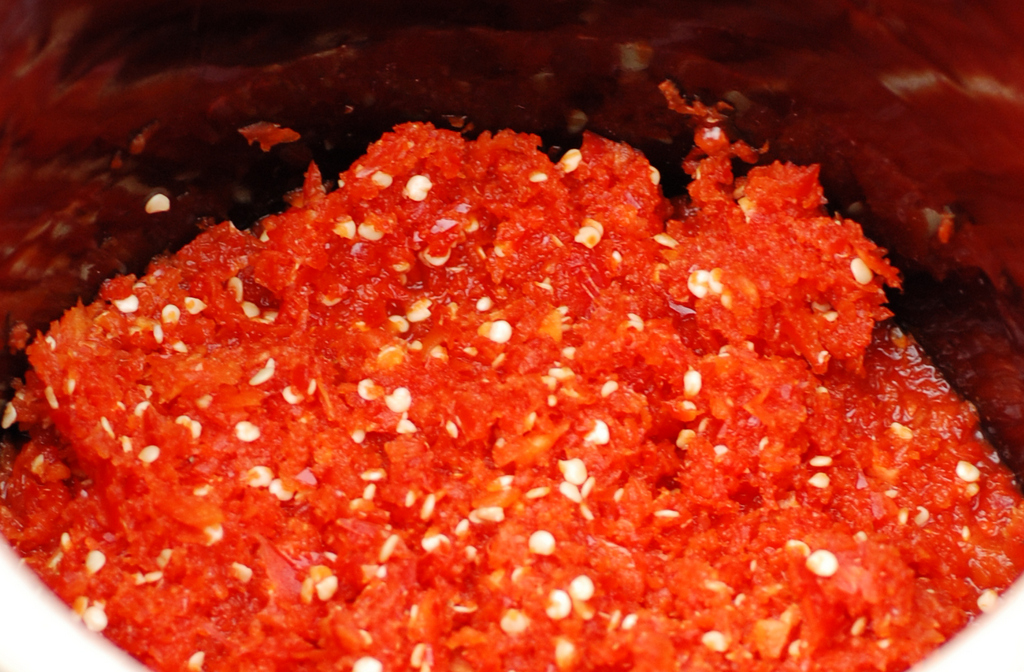
You’ll want to let your peppers ferment for at least a month to allow the flavor to become more complex and interesting. Store your crock at room temperature and be cover it with a clean dishtowel to keep out dust. Check on it from time to time to make sure that there is liquid covering the mash. After aging is finished, place your mash in a new clean and sterilized container. Add white wine vinegar to taste and age for about another week to allow the flavors to blend together.
Step 6: Running the mash through a food mill or strainer
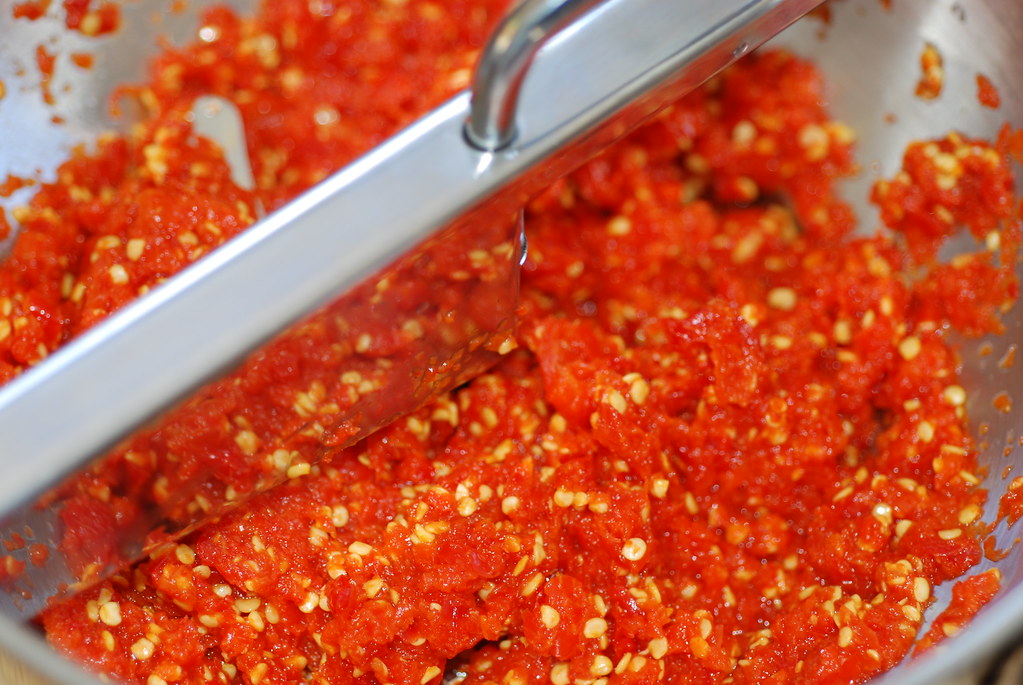
Straining your sauce allows you to remove the seeds and create a smooth, pourable texture. If you don’t have a foodmill or strainer you can pour your vinegar mash mixture into a bowl lined with cheesecloth, fold the cheesecloth up into a ball and twist & squeeze until the juice is extracted. The original Tabasco sauce is quite liquid, but I like mine with some pulp.
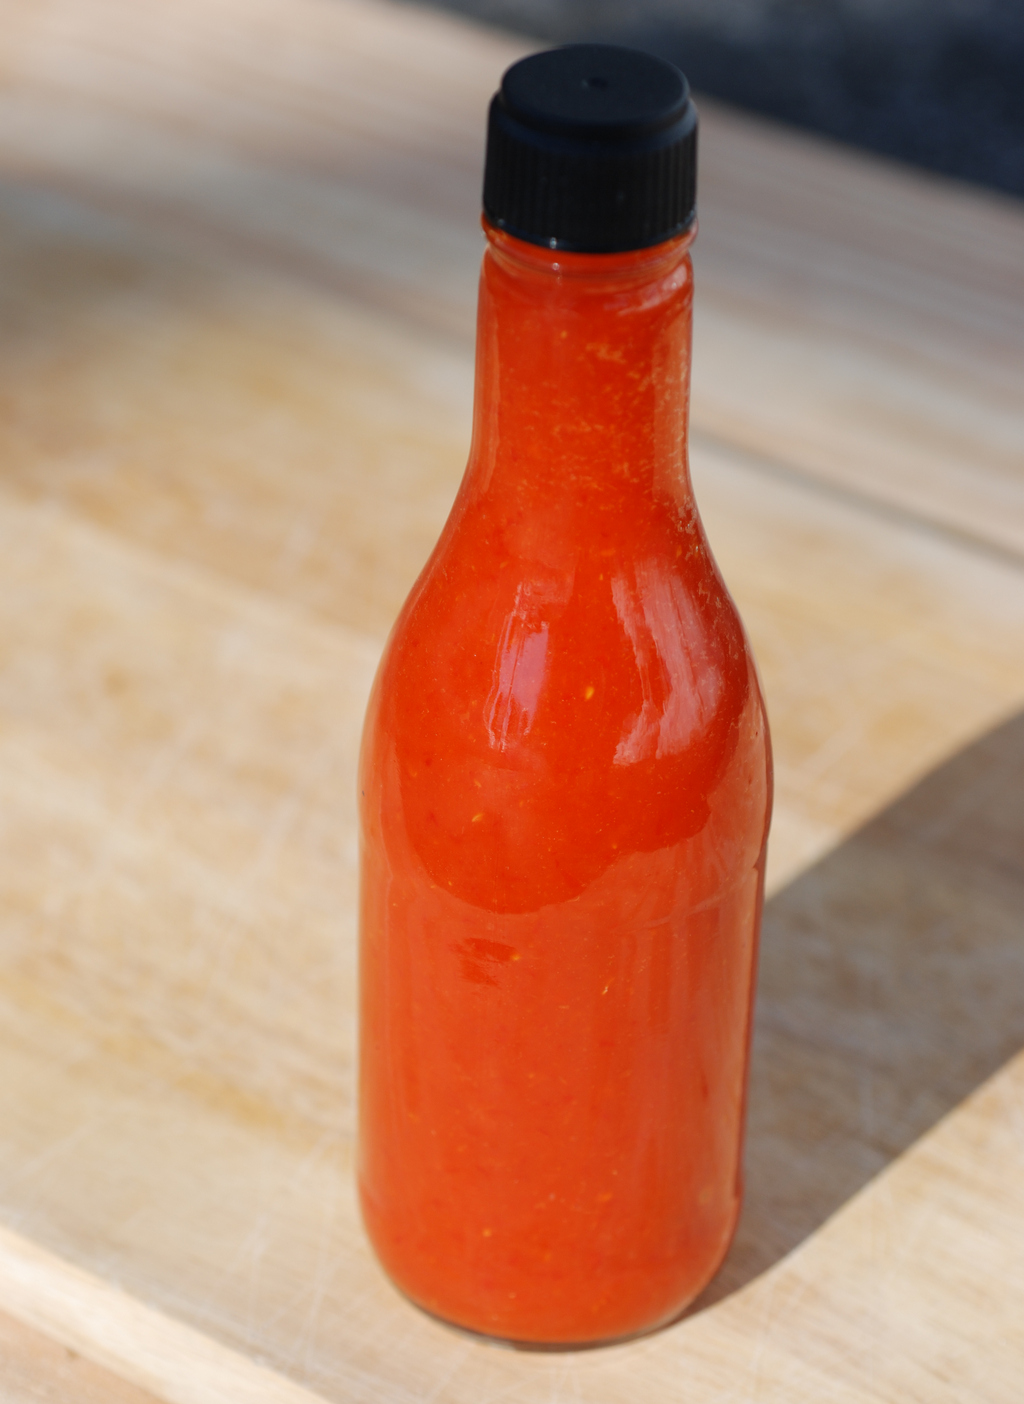
Step 7: Bottling your sauce and keeping it refrigerated
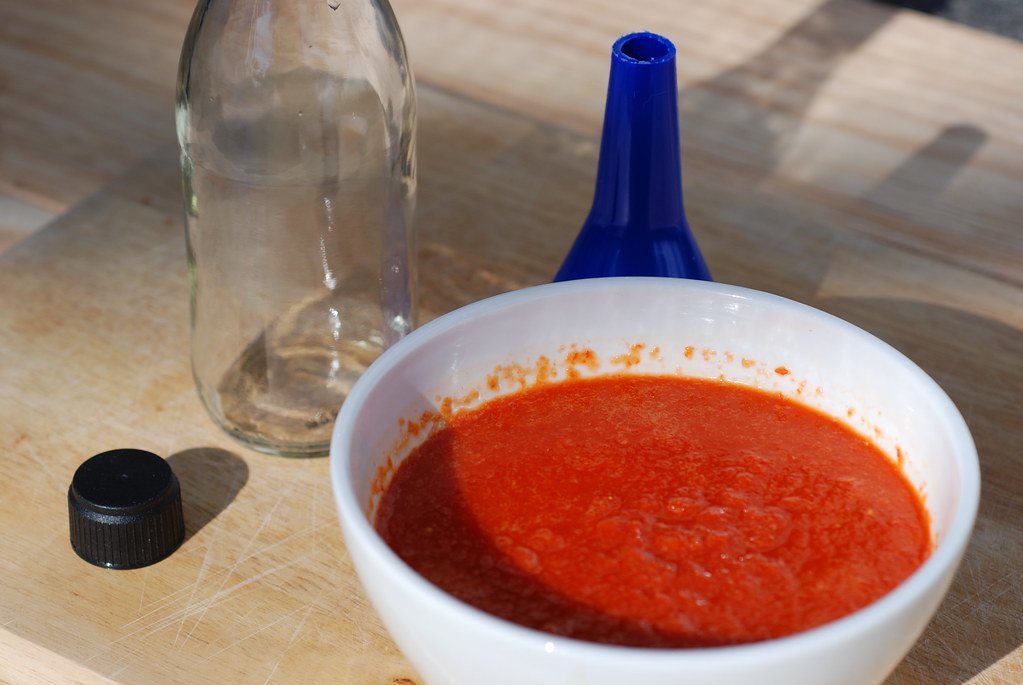
Your homegrown hot sauce should easily keep for several months, but it’s so good that I doubt it will last that long.
Step 8: Enjoy and “laissez les bons temps rouler!”